
Ugly, isn't it? But, believe it or not, there is a way around this. I've used it in my first-person shooter test.
You'll need a file called bw_grad.png which can be downloaded by saving this file to your computer.
Got everything? Then let's go.
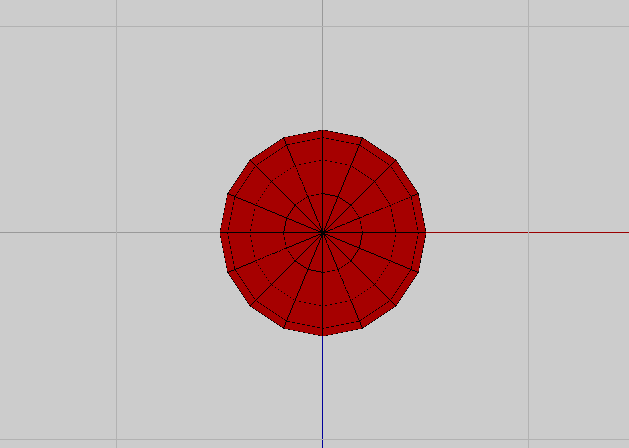
1. Create a sphere.
2. Scale it to Wonderland's tile size (right-click -> Absolute Commands -> Scale -> X=1, Y=1, Z=1).
3. Move it up to ground level (right-click -> Absolute Commands -> Move -> X=0, Y=0.5, Z=0).
4. Press Y to stare at it from above and O to turn on orthographic view.
5. Press F to switch to face mode, and from the top-down angle you are in, select all the faces that you can see (i.e. do NOT select backfaces).
6. With the upper hemisphere selected right-click anywhere inside the geometry window and select UV Mapping. A new window should open up, titled AutoUV Segmenting: sphere1.
7. Inside the AutoUV Segmenting window, press Ctrl+A to select all faces. Make sure you're still in face mode; if not, switch to it by pressing F.
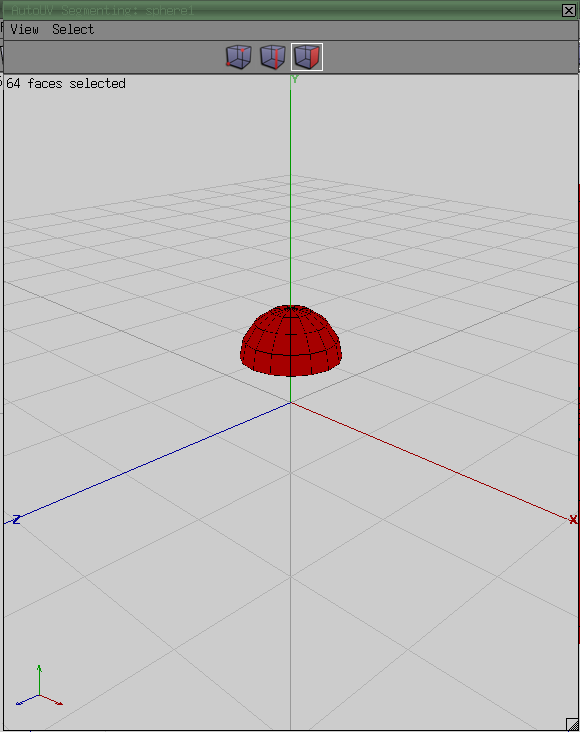
8. Right-click anywhere inside the AutoUV Segmenting window and select Continue -> Projection Normal. A new window should open up, titled AutoUV: sphere1. You can see the entire hemisphere here in one piece, mapped to a texture.
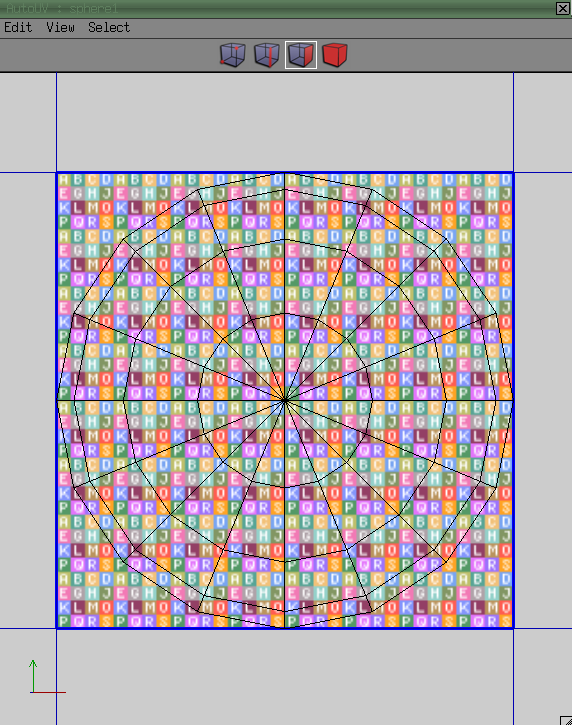
9. Use File -> Import Image to import bw_grad.png:

10. Right-click anywhere inside the texture map window and select Create Texture. A new window should open up, titled Draw Options.
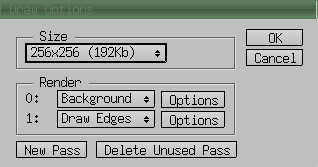
Inside that window follow these steps:
10.1. Set Size to 256x256 (192Kb) if it hasn't been set to that yet.
10.2. There should be two Passes in the Render box, Pass 0 and Pass 1. IN PASS 1, CHANGE DRAW EDGES TO NONE. THIS IS EXTREMELY IMPORTANT.
10.3. In Pass 0, click Options, and you'll be able to select a texture for your model. Change auvBG to bw_grad (the image we imported in step 9).
10.4. Click OK in the image chooser and the Draw Options window.
11. There should now be our image instead of the ABC texture that has been on earlier. Close the texture mapper window.
12. You're back in the geometry window, but now the upper hemisphere is textured (kinda). Press Shift+Y to look bottom-up.
13. From the bottom-up angle you're in, select all the faces that you can see (i.e. do NOT select backfaces).
14. With the lower hemisphere selected right-click anywhere inside the geometry window and select UV Mapping. A new window should open up, titled AutoUV Segmenting: sphere1.
15. Inside the AutoUV Segmenting window, press Ctrl+A to select all faces. Make sure you're still in face mode; if not, switch to it by pressing F.
16. Right-click anywhere inside the AutoUV Segmenting window and select Continue -> Projection Normal. A new window should open up, titled AutoUV: sphere1... but this time, Wings3D remembered our texture from last time. So now, you can just close the texture mapper window, export as 3ds, test it in the game (not the one you just lost) and hopefully it'll be shaded!
If not... try again.
NOTE: In the File -> Export menu, there's the 3ds option and a little window icon next to it. Click on the window instead, and set it to save the textures as *.jpg instead of *.bmp, or else Wonderland will divide by zero.