(though I probably wouldn't say no if anyone asked me to design a few adventures
Wonderland Adventures: Hidden Realms - Update Thread
Oh, stop it, you!  I'm really flattered that my recent efforts have been appreciated, but having played some of the more recent adventures, I can say that there are a lot of great adventure designers around (though maybe not all of them are currently active) and I'm just glad you think I'm a part of that. Also, I'm pretty sure Q is either underestimating or understating his own skills.
(though I probably wouldn't say no if anyone asked me to design a few adventures )
)
(though I probably wouldn't say no if anyone asked me to design a few adventures


Thanks for all the positive comments again! 
On a more serious note - I wouldn't be against the concept of working in a group for something like this. As I've stated before, though, I'm taking this solo because I feel more comfortable that way.
Once I get further in and the difficulty needs to start going up, we'll see, but for the earlier stages, I think I can manage.
Have to admit, I'm not sure what you mean here. What I did here was just use X/YAdjust on the Fencepost model to position it under the bridges, no model-swapping involved.md wrote:I already did the exact same thing with the MOFI Bridges long ago.dig 222 wrote:I like what you did with the fence posts/MOFI bridges, no one has done that before.
All you need to do it set the model to Obstacle46 (which represents the MOFI Bridge).
Ahah, that'd be interesting, certainly.md wrote:Why don't you join forces with Lucky-Luc? You two would be unstoppable!
Luc's adventure making skills with your graphic designing skills; you two would dominate the Wonderland community!
In case you did not realise, that was just a joke.
On a more serious note - I wouldn't be against the concept of working in a group for something like this. As I've stated before, though, I'm taking this solo because I feel more comfortable that way.
Once I get further in and the difficulty needs to start going up, we'll see, but for the earlier stages, I think I can manage.

I was referring to the actual MOFI Bridge. You need to change it to Obstacle46 so it actually looks like the proper one and has the 3D effect, and it looks like you did that.Qloof234 wrote:Thanks for all the positive comments again!
Have to admit, I'm not sure what you mean here. What I did here was just use X/YAdjust on the Fencepost model to position it under the bridges, no model-swapping involved.md wrote:I already did the exact same thing with the MOFI Bridges long ago.dig 222 wrote:I like what you did with the fence posts/MOFI bridges, no one has done that before.
All you need to do it set the model to Obstacle46 (which represents the MOFI Bridge).
Ahah, that'd be interesting, certainly.md wrote:Why don't you join forces with Lucky-Luc? You two would be unstoppable!
Luc's adventure making skills with your graphic designing skills; you two would dominate the Wonderland community!
In case you did not realise, that was just a joke.
On a more serious note - I wouldn't be against the concept of working in a group for something like this. As I've stated before, though, I'm taking this solo because I feel more comfortable that way.
Once I get further in and the difficulty needs to start going up, we'll see, but for the earlier stages, I think I can manage.
Also, I know how it feels; you always feel more comfortable doing it by yourself, most likely because you do not have to rely on others.
However, if you ever do need help with adventures, I would not hesitate to help and I won't say "no".
If you bothered to copy and paste this signature, or zoom in, to make it possible to read, then I wasted 5-10 seconds of your life.
Must admit I'm still not sure what you mean here. Are you referring to the MoFI conversion .wop set? If so, I'm using cbloopy's MoFI-model-hacked editor. I can't even imagine how nightmarish positioning the bridges would be using the non-MoFI modelsmd wrote:I was referring to the actual MOFI Bridge. You need to change it to Obstacle46 so it actually looks like the proper one and has the 3D effect, and it looks like you did that.
Also, I know how it feels; you always feel more comfortable doing it by yourself, most likely because you do not have to rely on others.
However, if you ever do need help with adventures, I would not hesitate to help and I won't say "no".
On another note, (minor) status report!
Once again, I still haven't made much "evident" progress since last time (41 adventures, 31 hub levels). However, I've put together the ending of Chapter 2, so (in theory) everything up to this point should fit together without any massive problems. Basically, I've got the core of Chapter 2 done, more or less, other than a few "extra" areas to bridge between chapters (and some side-area stuff that I'm saving for much later), so Chapter 3 is now the current focus.
No, like, in the .wop file, you set a model (like FlipBridge, SteppingStone, etc). By changing the model to Obstacle46, u get the MOFI Bridge, which is what you have. This does not need a conversion as it is already supported by the cracked MOFI Editor.Qloof234 wrote:Must admit I'm still not sure what you mean here. Are you referring to the MoFI conversion .wop set? If so, I'm using cbloopy's MoFI-model-hacked editor. I can't even imagine how nightmarish positioning the bridges would be using the non-MoFI modelsmd wrote:I was referring to the actual MOFI Bridge. You need to change it to Obstacle46 so it actually looks like the proper one and has the 3D effect, and it looks like you did that.
Also, I know how it feels; you always feel more comfortable doing it by yourself, most likely because you do not have to rely on others.
However, if you ever do need help with adventures, I would not hesitate to help and I won't say "no".
If you bothered to copy and paste this signature, or zoom in, to make it possible to read, then I wasted 5-10 seconds of your life.

Not that nightmarish. If you mean FlipBridges, that was represented by a model that had been stretched to the proportions of a FlipBridge, so still not that nightmarish. Plus you can just memorize how many tiles long a FlipBridge is.Qloof234 wrote:I can't even imagine how nightmarish positioning the bridges would be using the non-MoFI models
i should change my signature to be rude to people who hate pictures of valves
blah blah weekly images blah
This is how I've decided to mark the player's internal monologue (which may or may not be a method I wholeheartedly stole from Ace Attorney).
CHOMPERS
Also, Temple courtyard. This is what's become of the Amphitheatre (though this is just the exterior of it). Also, yes, the chompers in my signature are part of this, because colours.
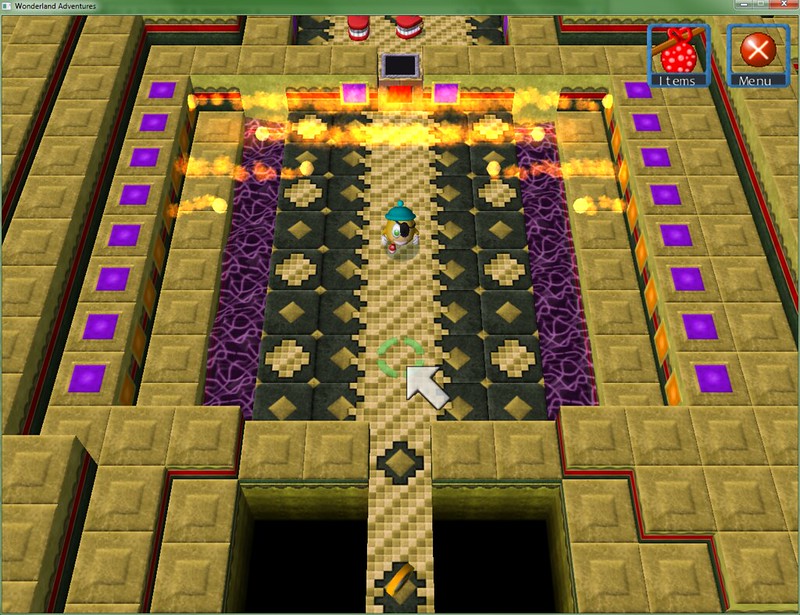
One of the courtyard adventures. Yes, I've changed the game's particles too, to fit with the colour alterations I've made to gates and such.

This is where that Temple texture comes into play. Much like in WSW, this is going to be used for the last level(s) as well.
TIME TO LEAVE
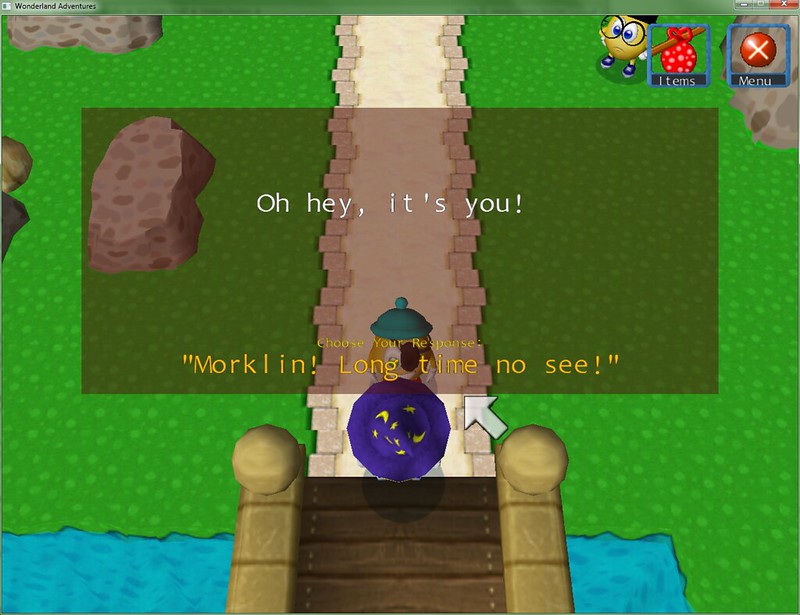
And that's the end of Chapter 1, where the player arrives just outside Wondertown and meets Morklin. One thing that I'm slightly concerned about is that the first chapter is rather long, and the story only really "starts" near the end of it (around the temple area). Personally, I don't think the pacing is troublesome, but I'll be open to comments about it when it comes time to test this.
Also, breaking pattern a bit with one last, very WIP image (aka this level has nothing in it yet, just the layout), because I'm quite happy with how it looks:
This is how I've decided to mark the player's internal monologue (which may or may not be a method I wholeheartedly stole from Ace Attorney).
CHOMPERS
Also, Temple courtyard. This is what's become of the Amphitheatre (though this is just the exterior of it). Also, yes, the chompers in my signature are part of this, because colours.
One of the courtyard adventures. Yes, I've changed the game's particles too, to fit with the colour alterations I've made to gates and such.
This is where that Temple texture comes into play. Much like in WSW, this is going to be used for the last level(s) as well.
TIME TO LEAVE
And that's the end of Chapter 1, where the player arrives just outside Wondertown and meets Morklin. One thing that I'm slightly concerned about is that the first chapter is rather long, and the story only really "starts" near the end of it (around the temple area). Personally, I don't think the pacing is troublesome, but I'll be open to comments about it when it comes time to test this.
Also, breaking pattern a bit with one last, very WIP image (aka this level has nothing in it yet, just the layout), because I'm quite happy with how it looks:
-
Super Nuclear Power
- Rainbow Wonderlander
- Posts: 187
- Joined: Sun Mar 17, 2013 12:52 am
Great to have you back SNP!Super Nuclear Power wrote:I must admit, this looks really cool! I'll probably be downloading this when a demo comes out.
The latest screenshots look simply amazing!
If you bothered to copy and paste this signature, or zoom in, to make it possible to read, then I wasted 5-10 seconds of your life.

Super Nuclear Power wrote:I must admit, this looks really cool! I'll probably be downloading this when a demo comes out.
Previous Adventure:Time Out
Latest Adventure:Please Don't Feed The Dinosaurs!
Upcoming Adventure: History Lessons
Latest Adventure:Please Don't Feed The Dinosaurs!
Upcoming Adventure: History Lessons
-
Super Nuclear Power
- Rainbow Wonderlander
- Posts: 187
- Joined: Sun Mar 17, 2013 12:52 am
I never really left, I'm always checking the forum, and I post occasionally on stuff I find interesting.md wrote:Great to have you back SNP!Super Nuclear Power wrote:I must admit, this looks really cool! I'll probably be downloading this when a demo comes out.
The latest screenshots look simply amazing!
Thanks for positive comments, again!
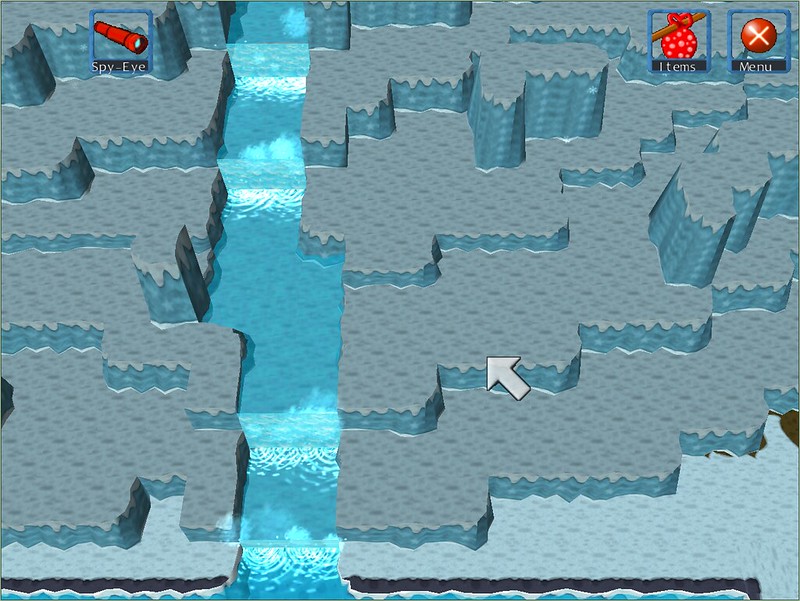
Another relatively small update from Foggy Mountains:
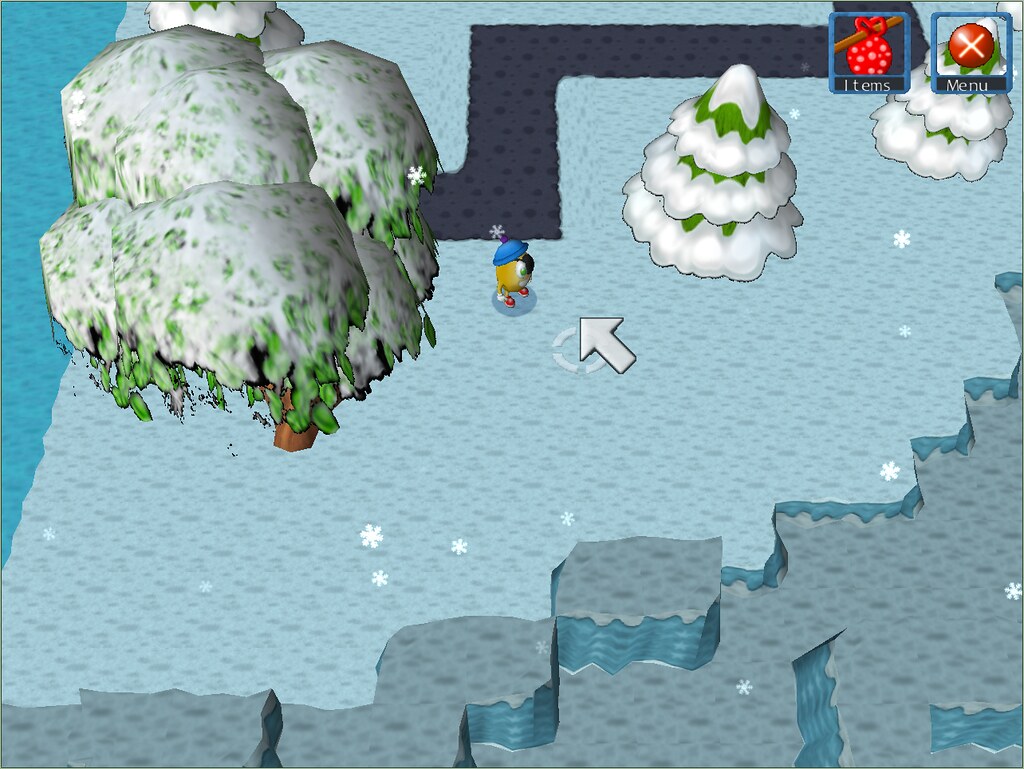
The tree texture here needs some cleaning up, there are a few artifacts hanging around. Other than that, how does it look?
Also, I'll throw this out again, 'cause I think it got missed in the long post it was in originally:
I'm almost certainly going to look into remaking all the Stinker hat/accessory textures for consistency (which shouldn't be too hard, just a bit time-consuming, so I'll leave it for a bit later). Unlike the new variants on the original level textures, these aren't really "necessary" for the game (the new leveltex's have some added tiles in there and stuff, which I'll need to edit out).
What do you think I should do regarding the Stinker's hats? I can either include them with HR itself upon release, or not. Either way I'll be releasing the textures as a downloadable "pack" for any who potentially want to apply it to the other WA games (or HR if it ends up being separate).
Another relatively small update from Foggy Mountains:
The tree texture here needs some cleaning up, there are a few artifacts hanging around. Other than that, how does it look?
Also, I'll throw this out again, 'cause I think it got missed in the long post it was in originally:
I'm almost certainly going to look into remaking all the Stinker hat/accessory textures for consistency (which shouldn't be too hard, just a bit time-consuming, so I'll leave it for a bit later). Unlike the new variants on the original level textures, these aren't really "necessary" for the game (the new leveltex's have some added tiles in there and stuff, which I'll need to edit out).
What do you think I should do regarding the Stinker's hats? I can either include them with HR itself upon release, or not. Either way I'll be releasing the textures as a downloadable "pack" for any who potentially want to apply it to the other WA games (or HR if it ends up being separate).


Very odd, as trees in winter don't have leaves. I'd suggest using apple tree without leaves instead, but that's only my personal opinionQloof234 wrote:The tree texture here needs some cleaning up, there are a few artifacts hanging around. Other than that, how does it look?
"Let us return to the past; it will be progress."
by Giuseppe Verdi
by Giuseppe Verdi
It depends if there are seasons in Wonderland. Without seasons they wouldn't even manage to sprout in the mountains, but if seasons exist in WA then they would simply wait for the snow to melt.Lucky-Luc wrote:This is supposed to be foggy mountains, right? Would broad-leaved trees grow there at all?
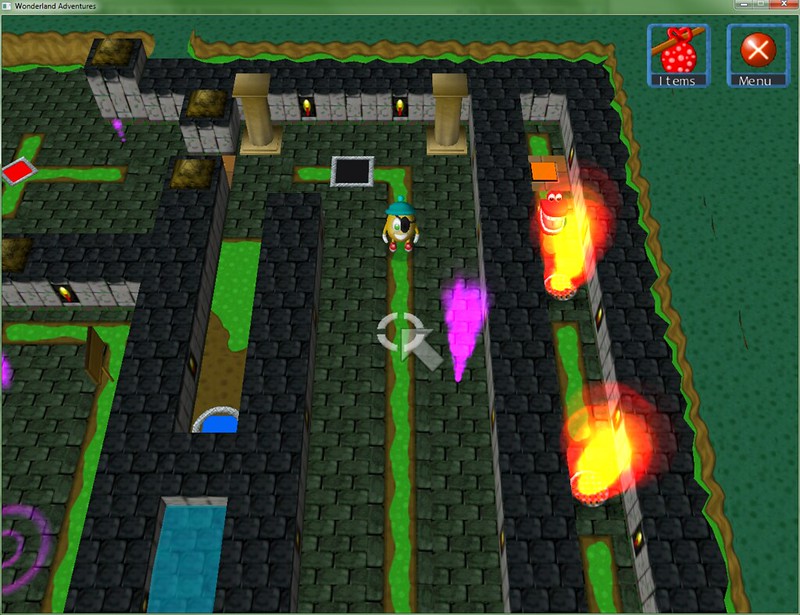
I love the particle changes you made. Splishes look fantastic under those waterfalls!
"Let us return to the past; it will be progress."
by Giuseppe Verdi
by Giuseppe Verdi
(wow this thread seems to have basically turned into my update blog considering I'm just posting like 2-3 sentence updates)
Feeling like a massive idiot at the moment, because I only just remember the Editor Tools' Hub Maker function, which makes things about 20 times easier. Herp de derp.
Currently, I'm going through all the adventures and adding in the Editor Tools functions to automate the "compile" process (well, okay, that's not really the best term for it, but still). Going to also double-check and make sure that things do work as intended when I do this (I fully expect them to, but better safe than sorry).
The Editor Tools objects (WinCMD, WinLose LevelXY, MoFI Win Condition) allow for the master.dat info to be done automatically.
The Hub Maker program finds these objects in the first level of an adventure, then copies them into the master.dat file, so the user doesn't have to set all the options manually.
It also copies over the selected adventures, renames them to the "Adventure#" format, and converts any MoFI/conversion objects in them.
Basically - Instead of converting adventures one-by-one and copying them manually, it does them all at once; I don't have to worry about whether or not the files I'm copying to the Data folder are all up-to-date because it'll get the latest ones from the Current folder; I don't have to manually edit every single master.dat file to make sure all the co-ordinates and such are good...
A lot of the busy-work is cut out through this.
WEEKLY UPDATE GET
Progress-wise; I've taken advantage of the Editor Tools objects to make the hub process a lot more streamlined, with no apparent bugs. One of the upsides to this (of which there are several) is that I don't have to go through each adventure and convert them separately if I'm using MoFI objects.
Other than that... Current adventure count is 47, with a 48th in the works. Hub-wise, 37 levels and 51 dialogue files (though the 51st is kinda empty at the moment).
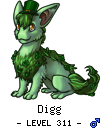
ANYWAYS WONDERTOWN AREA PICTURES
Town square. The purple-hatted Stinker allows the player to switch their hat/accessories around. The Stinker in front of the house there is asleep at the moment (I /might/ come back and add dialogue/a side adventure for some of the silent NPCs around this area).
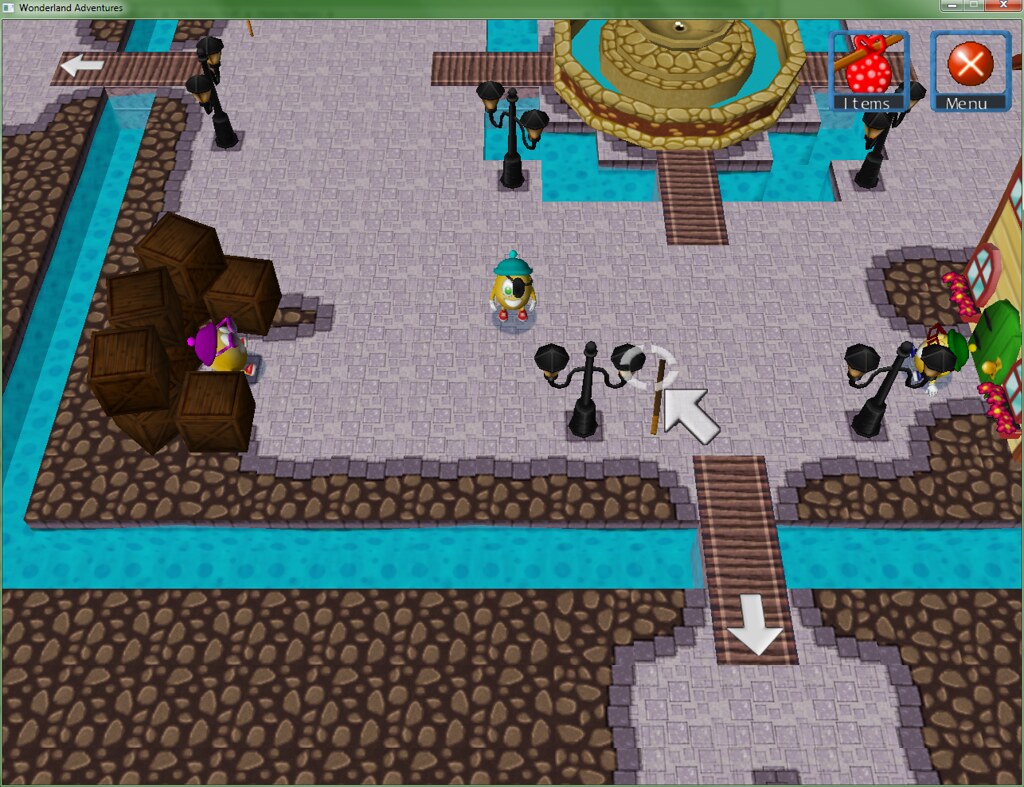
NPC Store. Yes, keeping up the injokes was completely necessary (also I made my own light blue-hatted character the store NPC, not that you can tell in that screenshot).
Also, map - I haven't designed the map graphics yet, but the player can buy a map piece here, which is what the blue gem near the bottom of the screen is - I'm using the WA beta gem-item model instead of the "item squares" for everything, now that I know how it works.

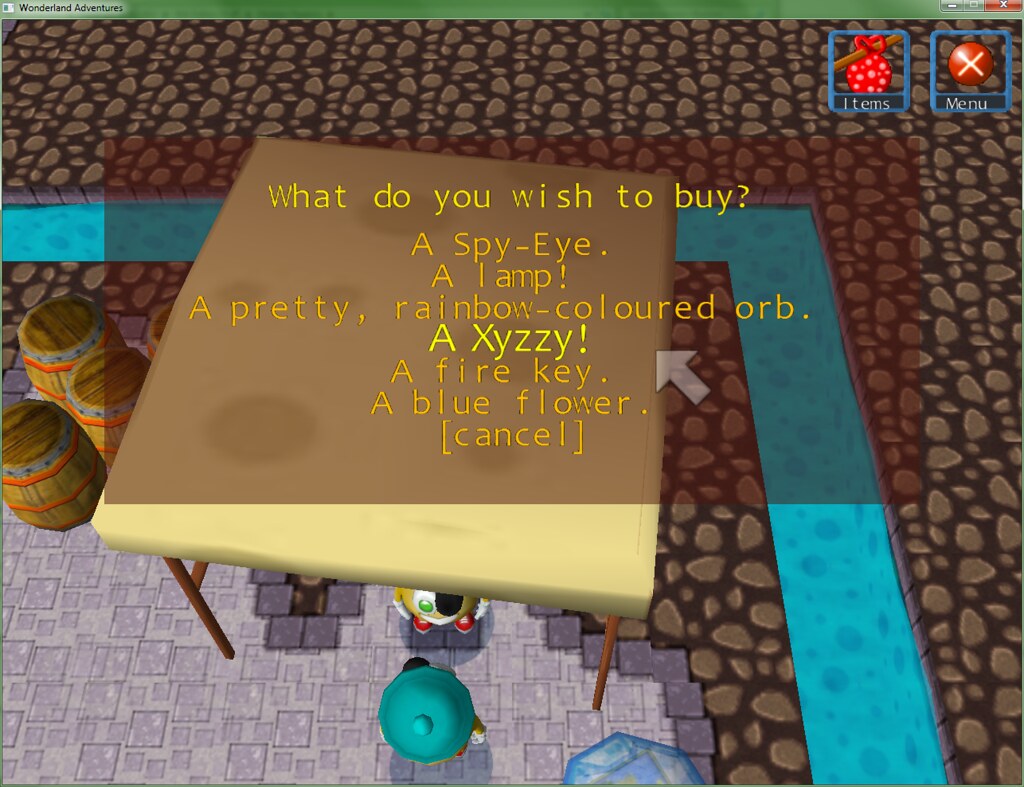
MAYOR'S OFFICE. The mayor is a separate NPC here, instead of being Peegue, though he's not in the office area. Also, both the NPCs in their "offices" to the sides walk around and do stuff (which is to say they walk around and stare at things because any interaction more complex than that is very tricky).
The "housing district", which is just north of the town square. There's an NPC in the north-east corner of this map who has a side-adventure the player can play for coins/score.
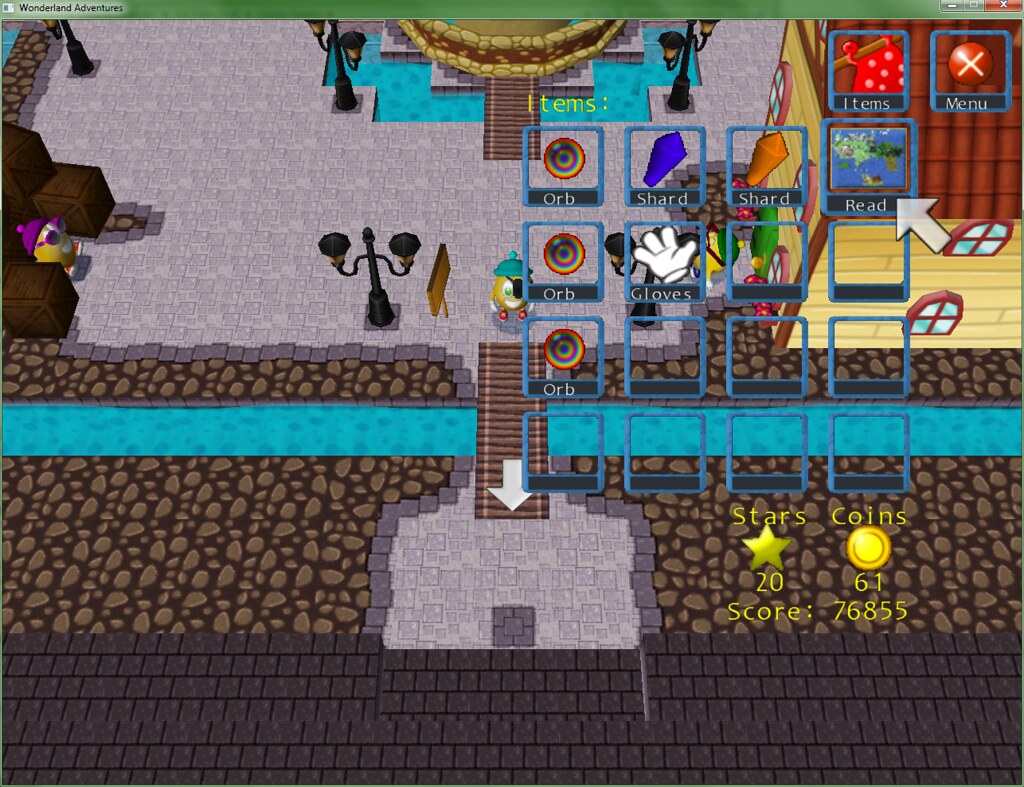
Very minor thing, but the map does have its own icon instead of the Fire Island map icon from MoFI - It's an edited and scaled down version of the world map from WSW. I thought it was appropriate.
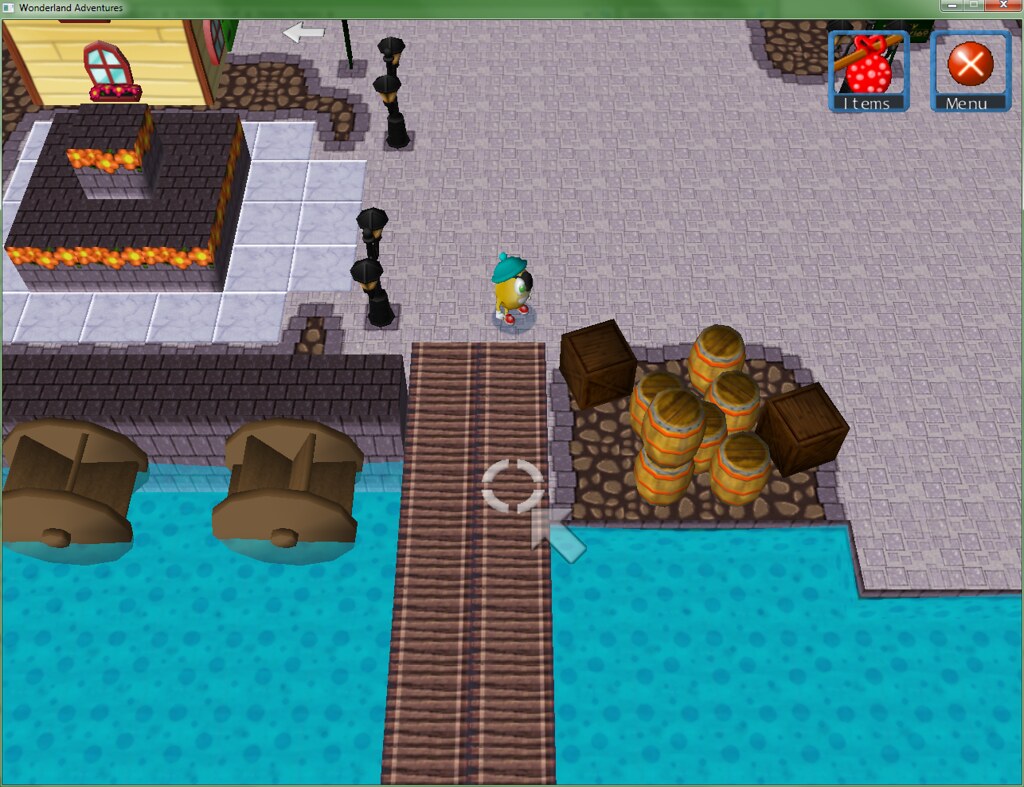
The Wondertown "Port", which is south of the town square. There's an NPC hanging around on the dock who's not pictured, as well as two other buildings and a boat. The building you can (barely) see is the Mayor's office. The other house is the boat-owner's home (the player needs to talk to him to progress at one point), while the other building (which isn't a house) is where I'm planning on putting the "magic trials" (as well as an NPC who can open the Floing menu for the player).
One of the first few adventures on Willow Rock Island (formerly just Willow Rock IIRC, and only a background part of WSW's map).
One concern I have is that I don't want to spread each area too "thin" by only having a small number of adventures there, but at the same time, I don't want to over-populate areas and wear myself thin with 200-odd adventures.
... Of course that's partially my fault for making the genius decision of "HEY WHY DON'T I EXPAND ON AREAS FROM WSW THAT SOUNDS LIKE A GREAT IDEA AND CAN'T POSSIBLY GO WRONG"
(anyways point is that it's entirely possible I'll end up expanding areas after the fact but it'll probably end up making the Floing menu go haywire or require a lot of work)
Progress-wise; I've taken advantage of the Editor Tools objects to make the hub process a lot more streamlined, with no apparent bugs. One of the upsides to this (of which there are several) is that I don't have to go through each adventure and convert them separately if I'm using MoFI objects.
Other than that... Current adventure count is 47, with a 48th in the works. Hub-wise, 37 levels and 51 dialogue files (though the 51st is kinda empty at the moment).
ANYWAYS WONDERTOWN AREA PICTURES
Town square. The purple-hatted Stinker allows the player to switch their hat/accessories around. The Stinker in front of the house there is asleep at the moment (I /might/ come back and add dialogue/a side adventure for some of the silent NPCs around this area).
NPC Store. Yes, keeping up the injokes was completely necessary (also I made my own light blue-hatted character the store NPC, not that you can tell in that screenshot).
Also, map - I haven't designed the map graphics yet, but the player can buy a map piece here, which is what the blue gem near the bottom of the screen is - I'm using the WA beta gem-item model instead of the "item squares" for everything, now that I know how it works.
MAYOR'S OFFICE. The mayor is a separate NPC here, instead of being Peegue, though he's not in the office area. Also, both the NPCs in their "offices" to the sides walk around and do stuff (which is to say they walk around and stare at things because any interaction more complex than that is very tricky).
The "housing district", which is just north of the town square. There's an NPC in the north-east corner of this map who has a side-adventure the player can play for coins/score.
Very minor thing, but the map does have its own icon instead of the Fire Island map icon from MoFI - It's an edited and scaled down version of the world map from WSW. I thought it was appropriate.
The Wondertown "Port", which is south of the town square. There's an NPC hanging around on the dock who's not pictured, as well as two other buildings and a boat. The building you can (barely) see is the Mayor's office. The other house is the boat-owner's home (the player needs to talk to him to progress at one point), while the other building (which isn't a house) is where I'm planning on putting the "magic trials" (as well as an NPC who can open the Floing menu for the player).
One of the first few adventures on Willow Rock Island (formerly just Willow Rock IIRC, and only a background part of WSW's map).
One concern I have is that I don't want to spread each area too "thin" by only having a small number of adventures there, but at the same time, I don't want to over-populate areas and wear myself thin with 200-odd adventures.
... Of course that's partially my fault for making the genius decision of "HEY WHY DON'T I EXPAND ON AREAS FROM WSW THAT SOUNDS LIKE A GREAT IDEA AND CAN'T POSSIBLY GO WRONG"
(anyways point is that it's entirely possible I'll end up expanding areas after the fact but it'll probably end up making the Floing menu go haywire or require a lot of work)

-
Krishiv738
- Rainbow Keeper
- Posts: 340
- Joined: Mon Jul 22, 2013 9:47 am
Ah, thank you re: positive comments/signature bar.
Anyways, WEEKLY UPDATE TIME AGAIN (i wonder who's tired of this already)
Adventure-wise, there are 48, and I've got five more slots set up. The hub is a level larger than last time (38) and the most recent dialogue file, 51, is finished.
Screenshot time, again from Chapter 2's Willow Rock:
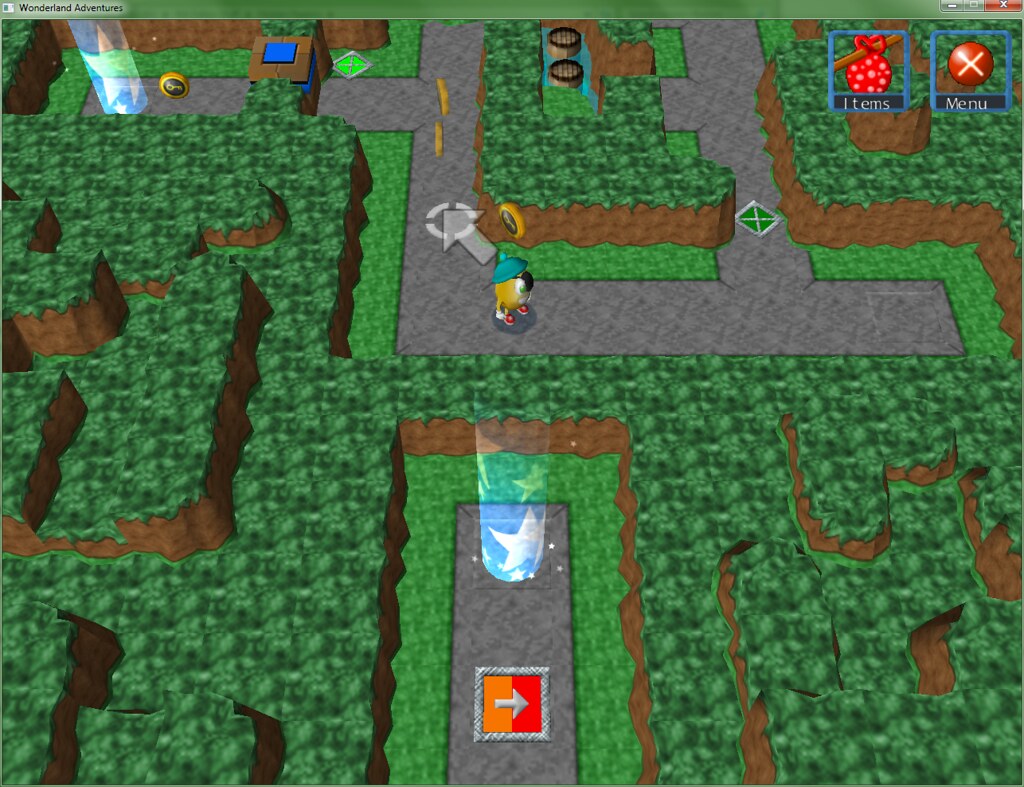
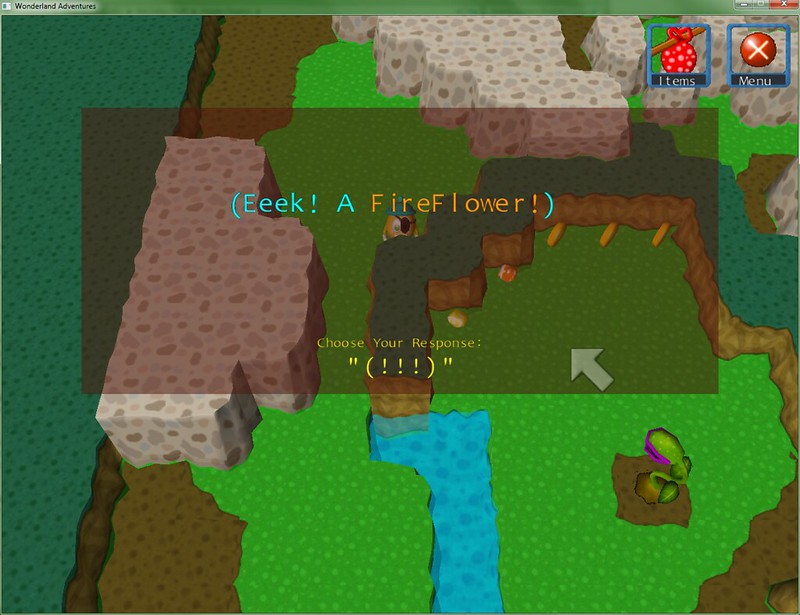
The Willow Rock levels introduce teleporters and colour-swap buttons.
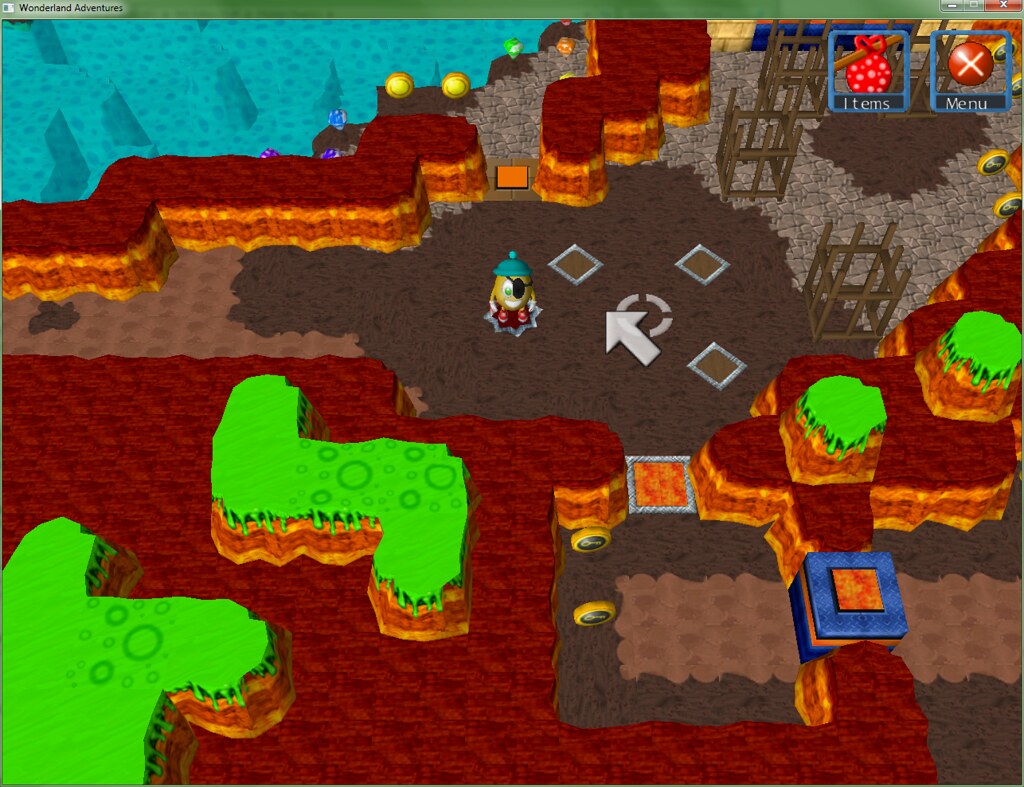
Another adventure, at maximum lighting for visibility (it's a darker one, but it's not pitch black).

Someone's even got a house here! (also yeah, coloured flowers)
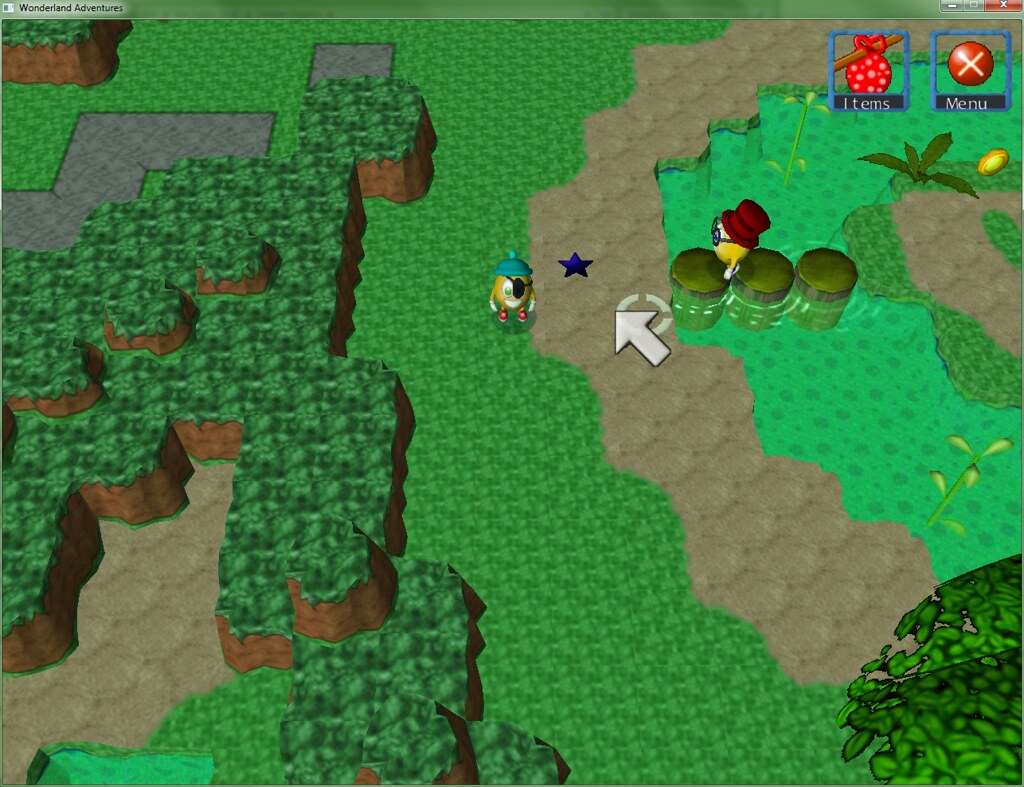
Turns out that this is where the Mayor's hiding (or something along those lines). There are two NPC's in Wondertown who provide the player with hints to check Willow Rock, so it's not unprecedented.
Also, yes, Peegue isn't the mayor - like I said, post-WA3.
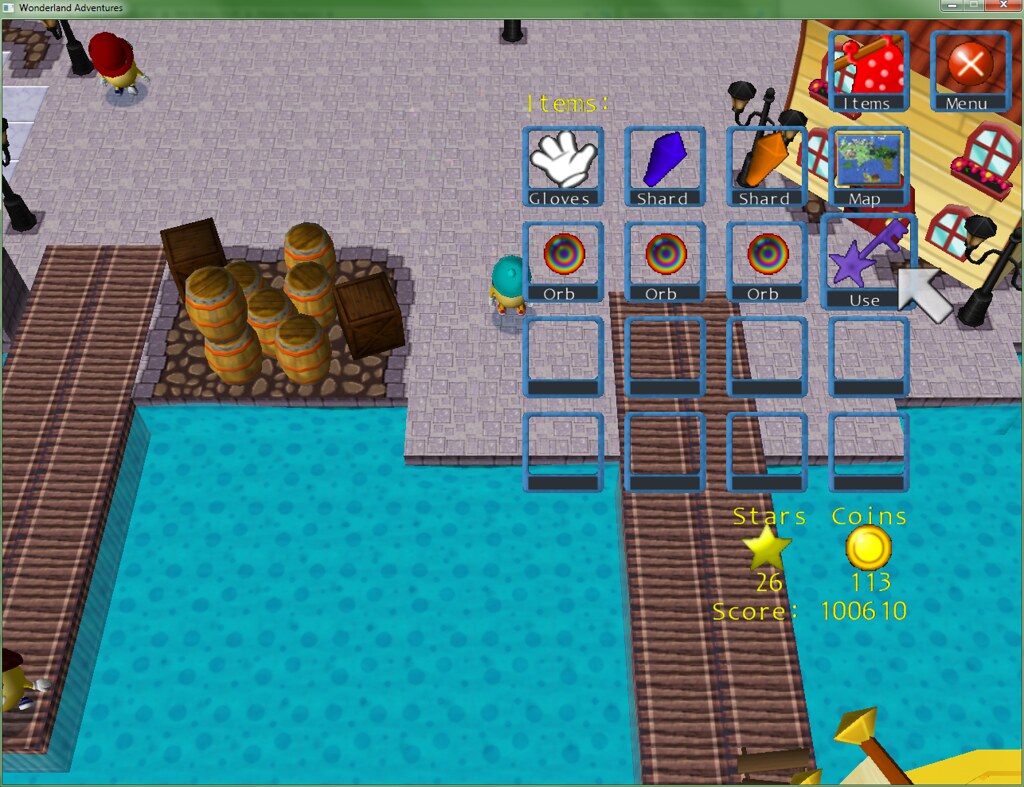
Town keys! It's not apparent in this picture, 'cause I'm dumb, but A) Item crystals are being used for everything, once again, and B) as I think I showed in another topic, each item has its own "name" to it (ie. the magic Orbs, which I do have plans for, and the key is labelled "Keys")
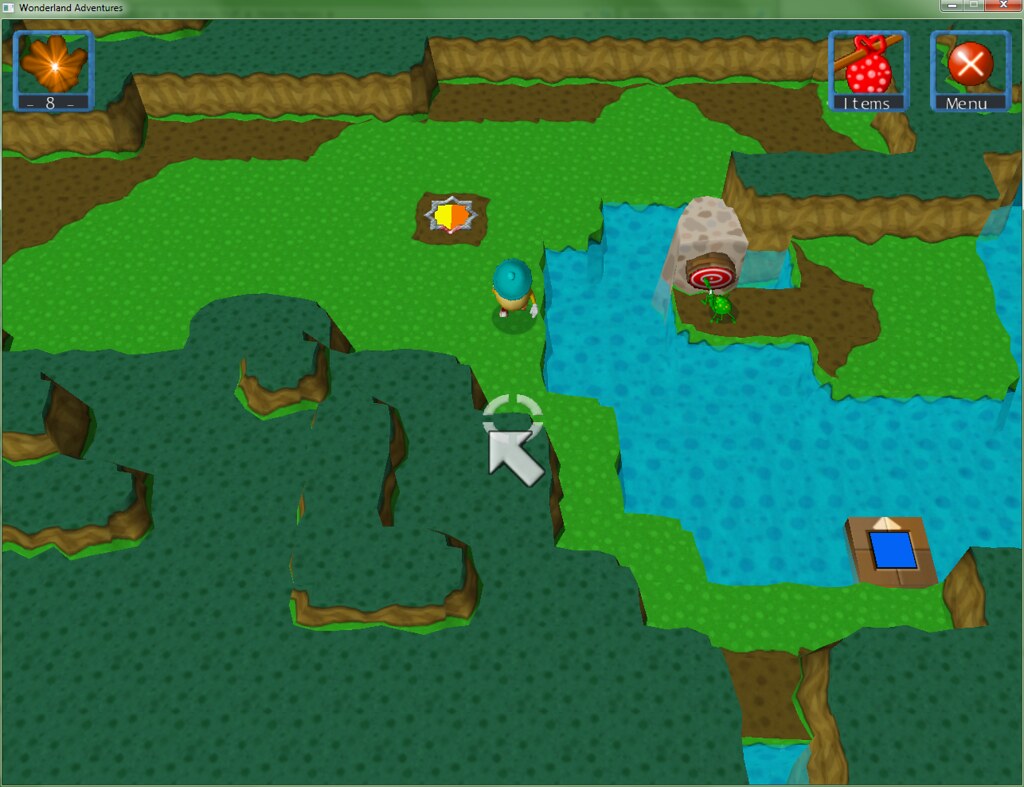
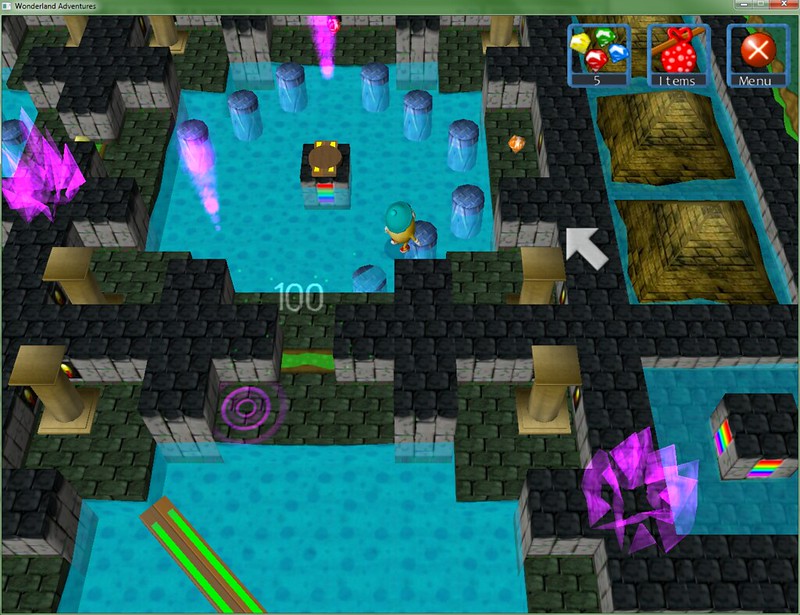
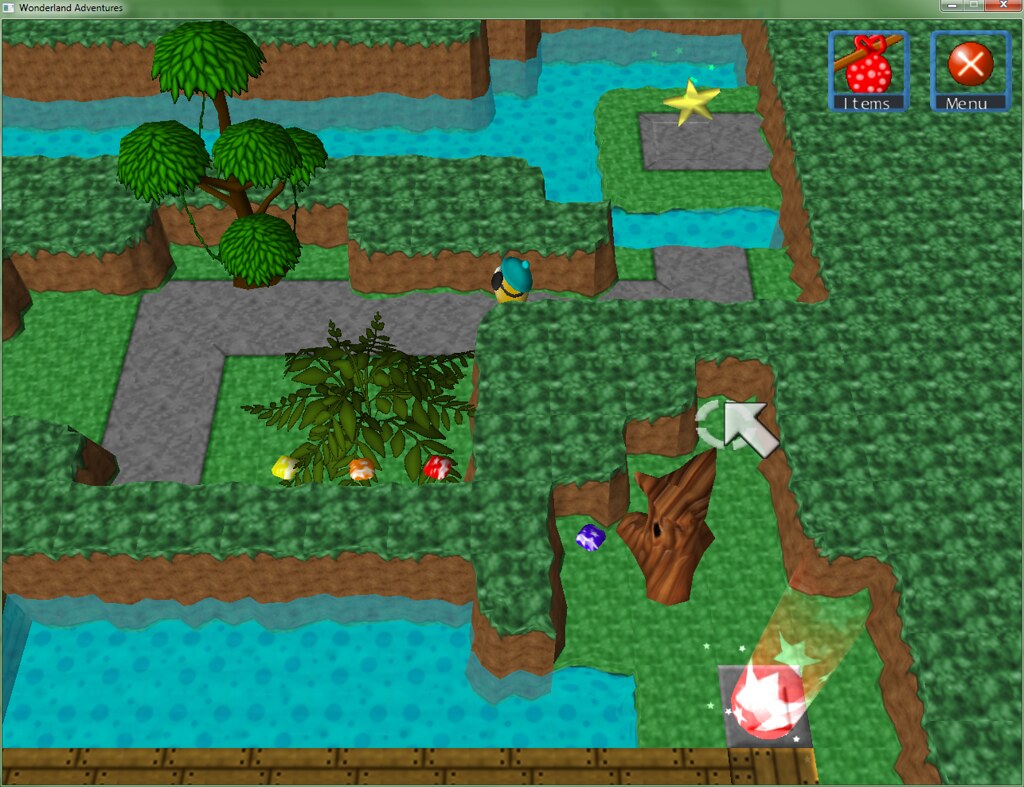
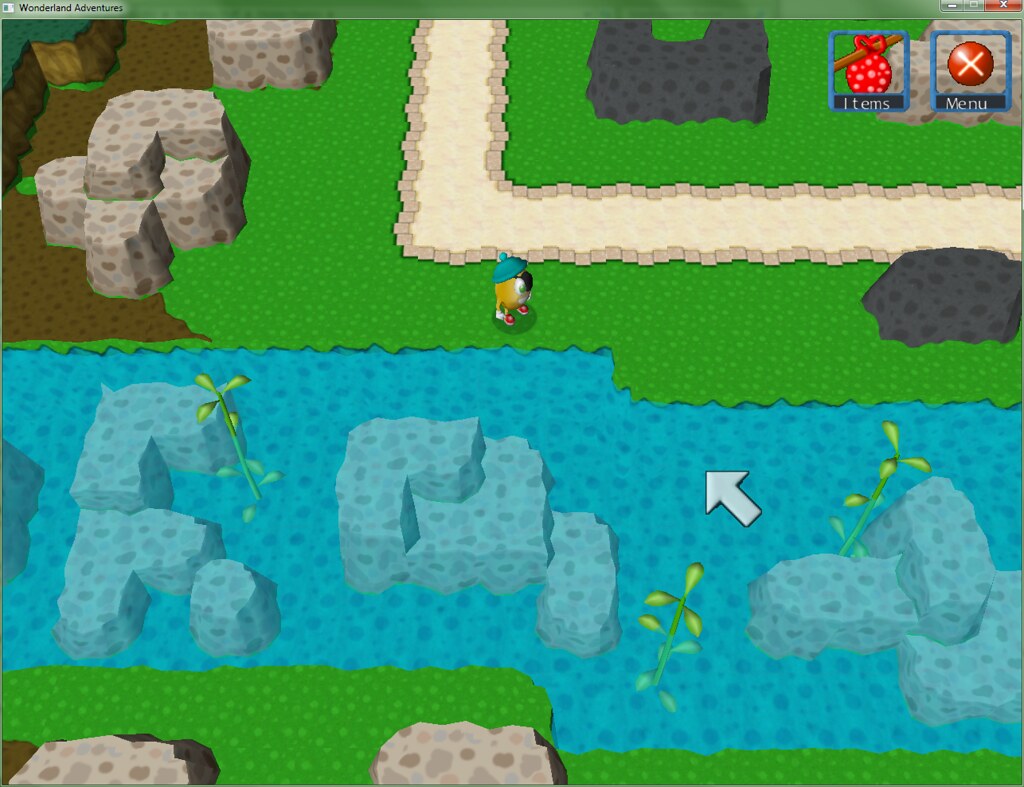
One of the first few adventures on The Plains. The obvious problem with this is that an area called "The Plains" doesn't exactly lend itself to much in the way of creative scenery, but I think I've found a way to manage it in the hub. Probably going to go back and populate adventures and hub levels with plants/flowers/etc. at some point anyways. Here's how one of the hub areas near the River Delta looks:
Anyways, WEEKLY UPDATE TIME AGAIN (i wonder who's tired of this already)
Adventure-wise, there are 48, and I've got five more slots set up. The hub is a level larger than last time (38) and the most recent dialogue file, 51, is finished.
Screenshot time, again from Chapter 2's Willow Rock:
The Willow Rock levels introduce teleporters and colour-swap buttons.
Another adventure, at maximum lighting for visibility (it's a darker one, but it's not pitch black).
Someone's even got a house here! (also yeah, coloured flowers)
Turns out that this is where the Mayor's hiding (or something along those lines). There are two NPC's in Wondertown who provide the player with hints to check Willow Rock, so it's not unprecedented.
Also, yes, Peegue isn't the mayor - like I said, post-WA3.
Town keys! It's not apparent in this picture, 'cause I'm dumb, but A) Item crystals are being used for everything, once again, and B) as I think I showed in another topic, each item has its own "name" to it (ie. the magic Orbs, which I do have plans for, and the key is labelled "Keys")
One of the first few adventures on The Plains. The obvious problem with this is that an area called "The Plains" doesn't exactly lend itself to much in the way of creative scenery, but I think I've found a way to manage it in the hub. Probably going to go back and populate adventures and hub levels with plants/flowers/etc. at some point anyways. Here's how one of the hub areas near the River Delta looks:
Last edited by Qloof234 on Sun Oct 20, 2013 5:33 am, edited 1 time in total.
-
StinkerSquad01

- Rainbow AllStar
- Posts: 4250
- Joined: Mon Aug 09, 2010 3:39 am
If I can figure out a way to do so (that doesn't look too bad, preferably), yeah, something like that could work.
I'd rather not resort to using custom models here - I know it's possible, and I've fiddled around with the converter tools and the settings enough so that I have a rough idea of how it works, but I'm not a modeller and I'd prefer to keep things as simple as possible (I mean, saying that, it's not like that's an easy task either, but...)
In other news, I have now learned - The best way to make harder levels, for me at least, is to take things slowly. I've come up with some that I think are pretty good for around the mid-section of the game, hopefully seeing what toys PoTZ has helps even more in that regard.